Timelines
How Long Does a Bathroom Remodel Really Take?
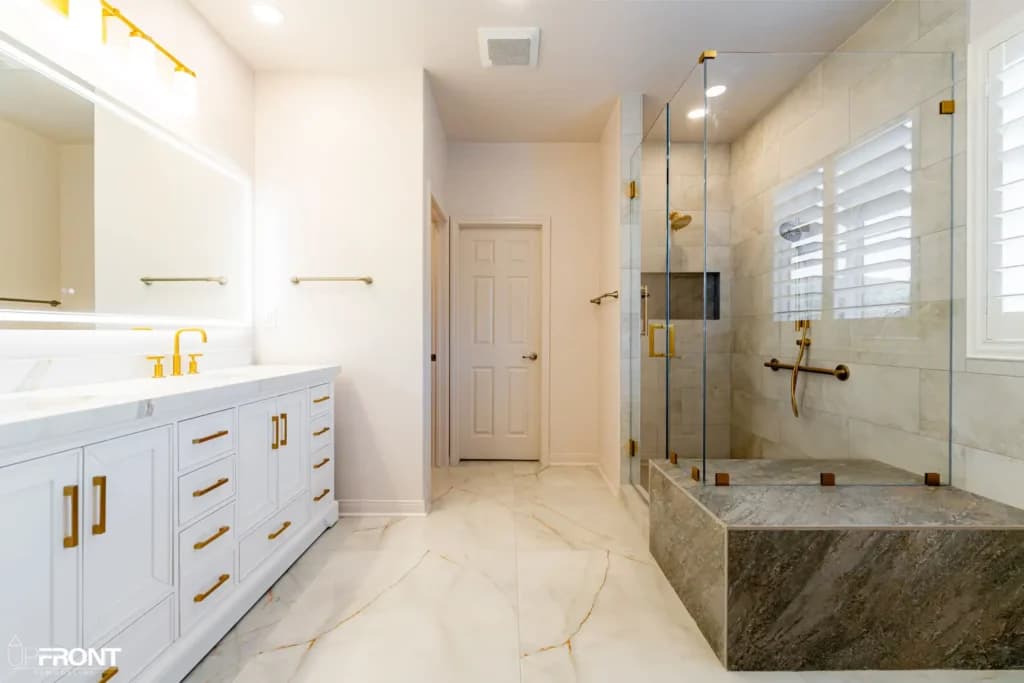
A single bathroom remodel typically takes 3 to 6 weeks from demolition to final walkthrough. Here's what happens week by week on a standard full remodel, and where projects tend to run longer.
Week 1: Demo and rough-in
Demolition of the existing fixtures, tile, and vanity, followed by any plumbing or electrical rough-in changes needed for the new layout. This is also when we confirm the subfloor and framing are in good condition before moving forward.
Week 2: Waterproofing and tile prep
Waterproofing membrane goes in around the shower and tub, followed by cement board and tile layout. This step is where a rushed remodel causes problems years later, so we don't skip it.
Weeks 3–4: Tile, vanity, and fixtures
Tile installation, custom vanity setting, and fixture installation happen here — this is usually the longest single phase because tile work is labor-intensive and can't be rushed without compromising quality.
Weeks 5–6: Finishing and punch list
Grout, caulk, mirrors, lighting, hardware, and final inspection. We walk the space with you before calling it done.
What extends the timeline
- Moving plumbing fixtures to a new wall
- Custom or special-order tile and fixtures
- Discovering water damage or dry rot once demo starts
- Multiple bathrooms remodeled at once
We give you a written schedule before work starts and flag any delays as soon as we see them — not after. See a recent master bathroom remodel in Simi Valley for a real example.
Materials and fixtures worth knowing about
The timeline above is driven almost entirely by tile and waterproofing, so the materials you pick for those two things affect the schedule more than anything else in the room. Deciding them before demo starts is what keeps the weeks above from slipping.
Tile
- Porcelain — denser and less porous than ceramic, and the most common choice for both bathroom floors and shower walls. Modern porcelain imitates marble, concrete and wood convincingly.
- Natural stone — marble, travertine and limestone are porous, need sealing, and marble etches with acidic cleaners. Beautiful, and more maintenance than most homeowners expect.
- Handmade tile — zellige and similar tiles vary in size and surface by design, which means a slower, more skilled install and a wider grout joint.
- Large-format and slab — fewer grout lines and a calmer wall, but a harder install: large panels need a very flat substrate and more hands to set.
- Shower floor — small mosaic tile is used on shower floors for a practical reason, not just a stylistic one. The many joints give grip underfoot, and small tiles can follow the slope to the drain in a way a large tile can't.
Grout, caulk and waterproofing
This is the part of a bathroom nobody photographs and everybody eventually notices. It's also where a rushed remodel shows up two or three years later.
- Epoxy vs. cement grout — cement-based grout is porous, so in a shower it absorbs water and soap and needs sealing and re-sealing. Epoxy grout is non-porous, resists staining and mold far better, and never needs sealing. It costs more and takes more skill to install, and in a wet area it's the upgrade we'd point to first.
- Sanded vs. unsanded — unsanded grout for joints under about 1/8", sanded for anything wider. Sanded grout can scratch polished marble, so the tile choice constrains the grout choice.
- Grout color — this changes the look of the room more than most people expect. Matching grout to the tile makes a shower read as one continuous surface; contrasting grout draws out the pattern. The practical guidance: avoid bright white grout on a shower floor, where it goes gray with use however well it's sealed, and consider going a shade or two darker on the floor than on the walls even when the tile is the same.
- Caulk, not grout, at changes of plane — inside corners, the joint where the wall meets the shower pan, and the perimeter of a tub should be caulked with a color-matched silicone rather than grouted. Those joints move slightly, and grout is rigid, so it cracks there. If a previous bathroom cracked in the corners, this is usually why.
- Waterproofing underneath — a sheet or liquid membrane behind the tile, a properly built pre-slope under the shower pan, and cement board rather than drywall. None of it is visible when the job is finished, which is exactly why it's worth asking about before you sign.
Shower and tub
- Enclosure — frameless glass is the most requested upgrade; semi-frameless costs less; a curtain is still a perfectly reasonable choice in a secondary bath.
- Curbless entry — a shower floor level with the bathroom floor. It looks clean, it's the most accessible option, and the slope has to be built into the subfloor, which is why it adds time as well as cost.
- Drains — a traditional center drain needs the floor sloped from four directions. A linear drain along one wall lets the floor slope in a single plane, which is what makes large-format tile possible on a shower floor.
- Valves — a pressure-balance valve is the standard single-handle mixer. A thermostatic valve holds a set temperature and can run more than one outlet at once, so if you want a rain head plus a hand shower, the valve has to be specified for it at rough-in rather than afterwards.
- Tub — a freestanding soaking tub is the current standard in a primary bathroom and needs a floor-mounted filler plumbed up through the floor. A built-in alcove tub-shower is faster, less expensive, and the right answer for a kids' or guest bath.
Vanity, counter and fixtures
- Vanity — a floating (wall-mounted) vanity makes a small room read larger and is easier to clean under, but the wall behind it has to be blocked to carry the weight, which is framing work done at rough-in. A freestanding vanity is a simpler install.
- Counter and sink — quartz is the low-maintenance default; an integrated sink molded into the counter has no rim to clean around; a vessel sink sits on top and changes the faucet height you need.
- Finish — brushed gold, matte black, brushed nickel, chrome and bronze cost roughly the same. Pick one family and carry it through the faucet, shower trim, towel bars, hinges and drain; mixing finishes is a deliberate look, not a default.
- Toilet — comfort height (roughly 17" to 19" to the seat) is now more common than standard height. A skirted one-piece toilet has no crevices around the base to clean. A wall-hung toilet needs an in-wall carrier and frame, decided at rough-in.
Flooring, ventilation and light
- Flooring — porcelain tile is the most durable and the most common. Luxury vinyl plank is fully waterproof, warmer underfoot and less expensive, and is a reasonable choice in a secondary bathroom. Natural stone needs sealing. Solid hardwood is the one material we'd steer you away from in a full bathroom.
- Heated floor — an electric mat under the tile is a modest material cost and needs its own thermostat and circuit. It goes in before the tile, so it's a yes-or-no decision made early or not at all.
- Ventilation — the exhaust fan should be sized to the room, vented outside rather than into the attic, and ideally on a timer or humidity sensor. An undersized or badly vented fan is the most common cause of mold in an otherwise well-built bathroom.
- Lighting — a sconce either side of the mirror lights a face evenly; a single ceiling fixture casts shadows downward. Any fixture inside a shower has to be rated for wet locations.
- Blocking for later — adding plywood blocking inside the walls for future grab bars costs very little during framing and is invisible afterwards. It's the cheapest accessibility decision available, and it's only available while the walls are open.
See more finished bathrooms in the project gallery, or read our kitchen remodel cost guide if you're planning both rooms together.